Exchange Network Services Center
Introduction
The Exchange Network Services Center (ENSC) is a web-based tool designed to allow Exchange Network users the ability to easily send, get, and download information from other partners on the Exchange Network.
The Exchange Network Services Center utilizes three methods for the exchange of environmental information:
- Send Info: Submit documents or information to another system on the Exchange Network.
- Get Info: Retrieve information from another system on the Exchange Network. This information is retrieved immediately through query services or requested and then downloaded through solicit services.
- Download: Download a document from another system on the Exchange Network with a transaction or document ID.
The Services Center provides two options for using data services. Guide Me Step-by-Step guides more novice users through the steps necessary to complete the transaction. Express Request allows advanced users to quickly complete their transaction (see “Exchange Network Services” for more information). The Service Center tracks a user’s previously used services and past activity for easy use in the future.
After 20 minutes of inactivity, a user's EN Services Center session will time out. The user will need to log back in to access the application.
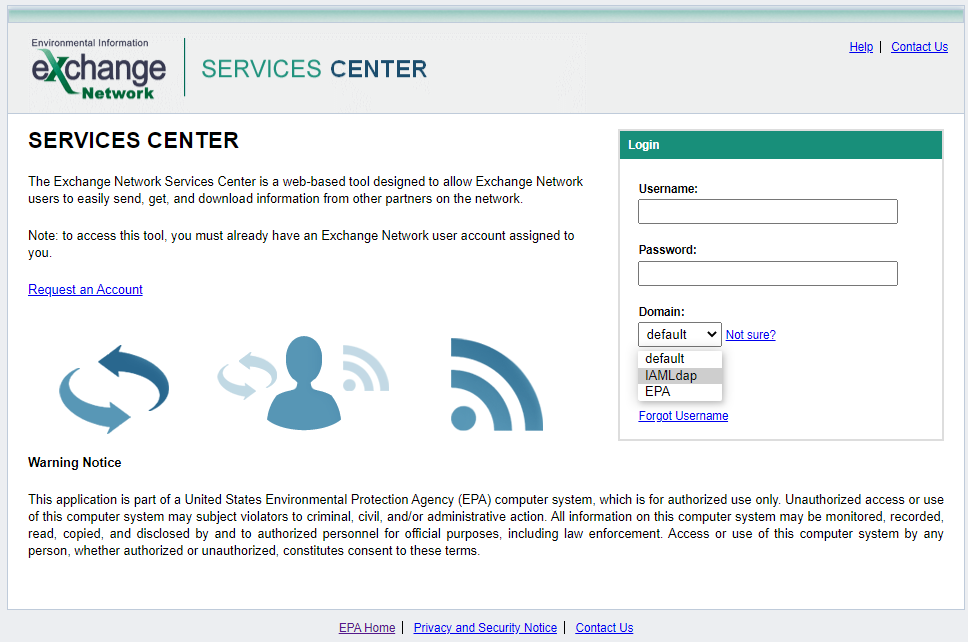
Logging In
Specify your Central Data Exchange (CDX) username, along with your password and appropriate domain to authenticate your account. The domain is tied to your user account. The appropriate domain must be provided to successfully log in. Most SLT EIS users have a domain of “IAMLdap”. This allows your CDX account to be accessed using the same password as your EIS account (which is authenticated against a different system called “Wide Area Access (WAA)”.
ENSC Main Menu
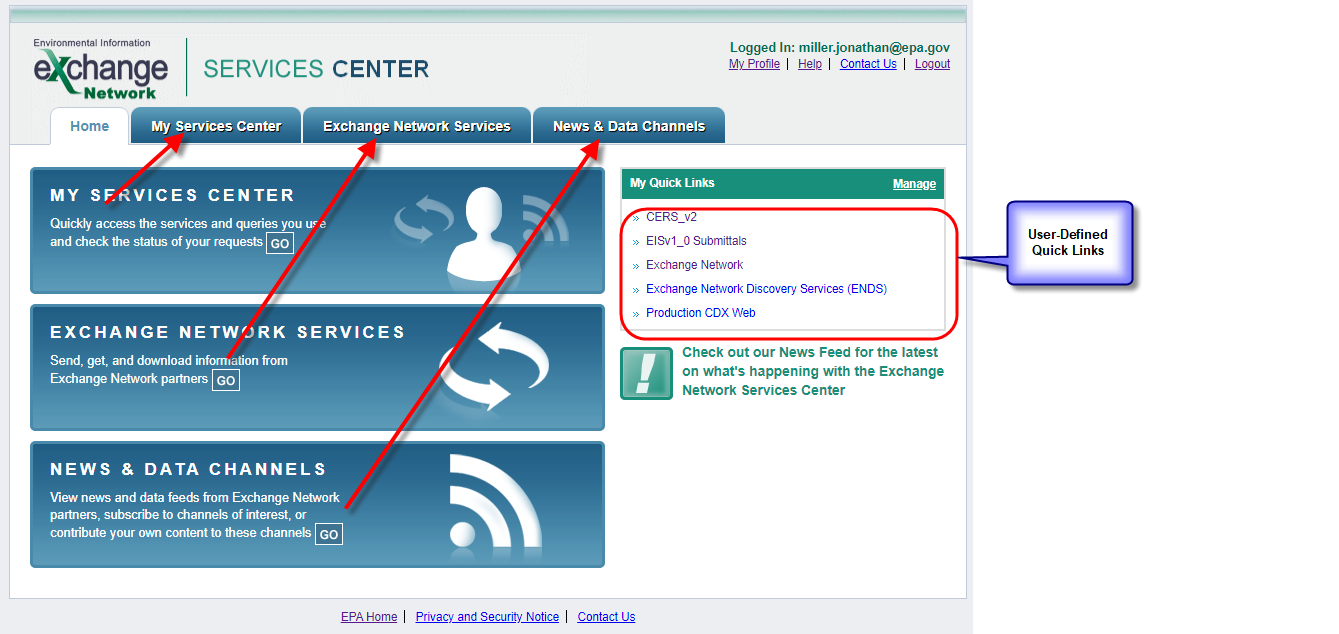
The main menu provides the interface that allows you to access all services available. You may also define “Quick Links”, which allows you to go to the services that you use most frequently.
My Services Center
This is accessed from the main menu either by
- a) Clicking on “Go” under the “My Services Center” section OR
- b) Clicking on the “My Services Center tab
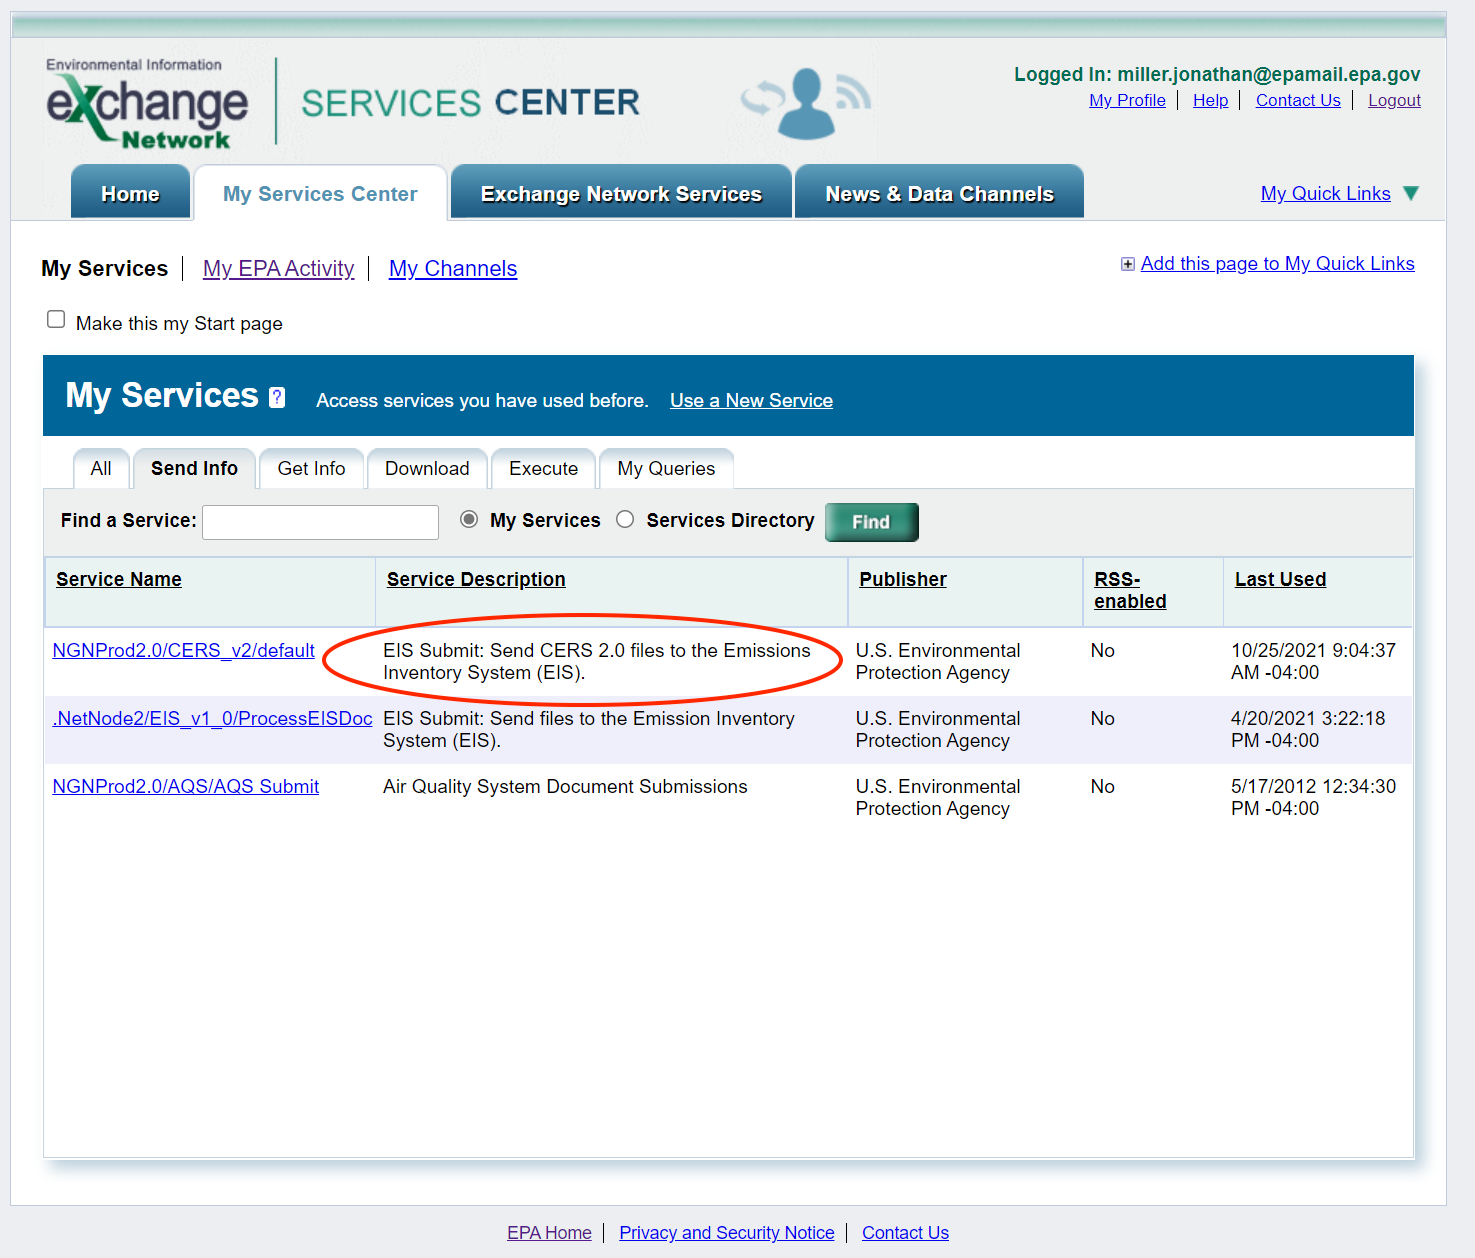
My Services lists all data services previously executed by a user, including the last date and time of use. This page can be accessed for convenient and repeatable use of specific services. New services used are automatically added to this page.
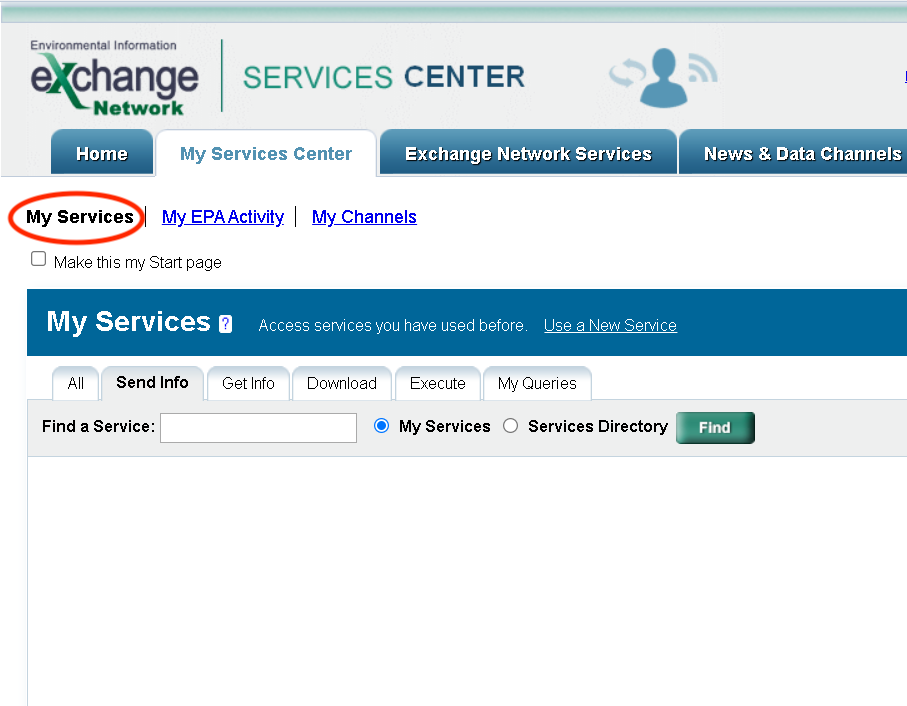
A full list of previously used services is under the "All" tab with the services then broken out by service type on the following tabs: Send Info, Get Info, Download and My Queries.
- Send Info services are used to send documents and information to a system on the Exchange Network.
- Get Info, Download, Execute, and Queries are used to obtain information from a system on the Exchange Network.
Users can search within My Services to find a previously used service. If the service needed is not listed within My Services, users can choose the radio button located at the top of the page to search within the Services Directory or click the “Use a New Service” link which will direct users to the full Services Directory.
The “My Activity” link lists all EN Services Center transactions completed by a user. This page provides the necessary details of a transaction to include:
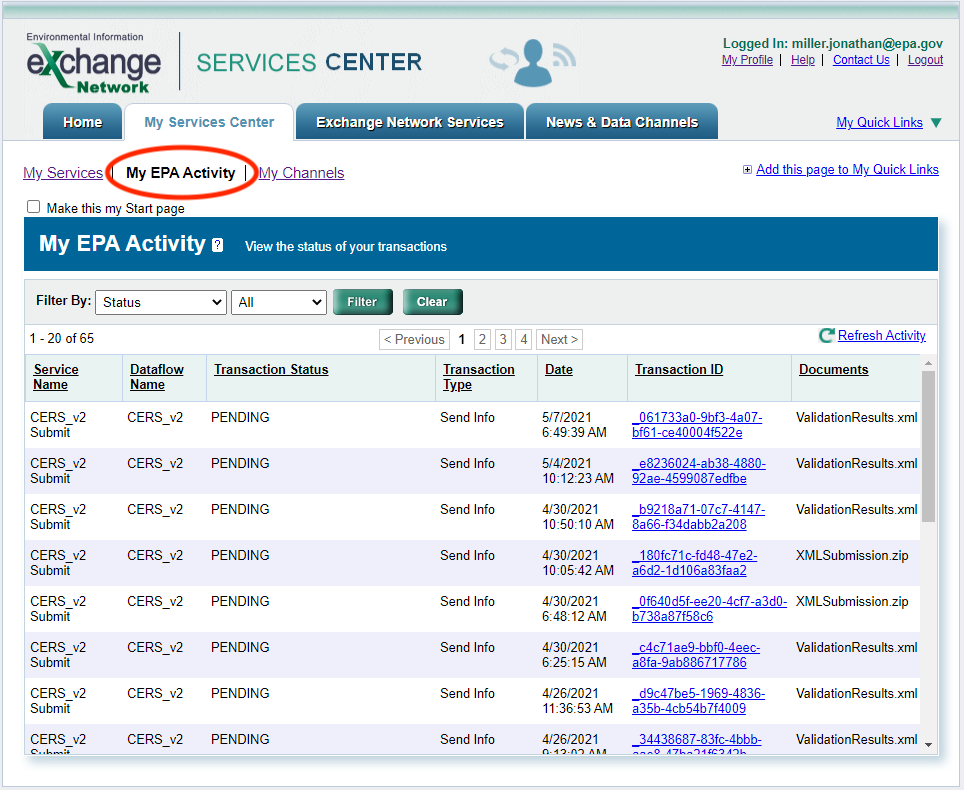
- The service used
- Transaction type
- Date and time of the transaction
- The transaction ID
A link is provided within the transaction ID for additional transaction details. Users can filter their activity by:
- • Status: Filter by the status of the transactions: Completed (a transaction was successfully completed), Failed (there was an issue with the submission, and it failed) and Pending (the transaction has not completed processing yet).
- • Dataflow: Filter by the Exchange Network dataflow from which the user submitted or obtained information.
- • Transaction Type: Filter by Send Info, Download or Get Info transactions.
- • Most Recent: Filter by transactions within the Last 30 Days, Last 60 Days, Last 90 Days or All Transactions.
- • Transaction Date: Filter by a date range of transactions.
- • Transaction ID: Filter by a specific Transaction ID.
Selecting the Clear button will remove any filters and show the full list of transactions. A Refresh Activity link is provided at the top right-hand corner of the My Activity page that is used to refresh the status of transactions as needed.
Users can select the “Make this my Start page” check box for this page to be the first page that appears when logged into the EN Services Center. Users can also click “Add this page to my Quick Links”, located in the top right corner of this page to add this page to the list of Quick Links.
Exchange Network Services
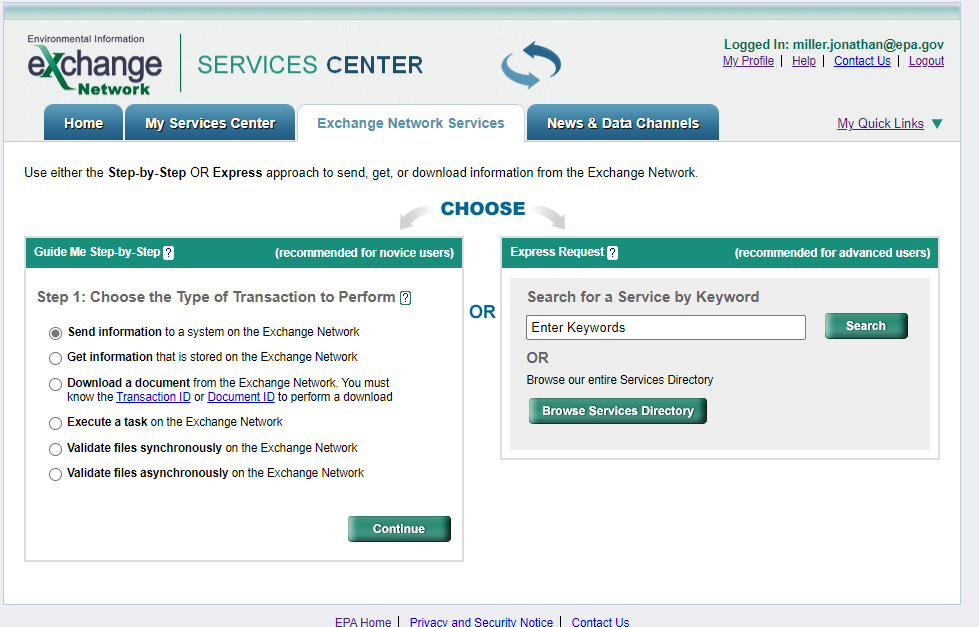
Allows users to search for Exchange Network Services either in a “Guide Me Step-by-Step” mode or in an “Express Request” mode.
Guide Me Step-by-Step
The Guide Me Step-by-Step path guides more novice users through the steps needed to send, get or download information from the Exchange Network. In easy to follow steps, users choose type of transaction (send, get or download), select the service needed, provide additional requested information and complete the transaction.
Express Request
The Express Request path is a quick and easy way for more advanced users to send, get or download information from the Exchange Network.
Users can search by service keyword or select to browse the Services Directory. Once a service is selected, users provide any additional requested information and complete the transaction.
How to Send an XML File to EIS
- 1) From the “My Service Center” tab, choose the “EIS Submit: CERS_v2 files to the Emissions Inventory System (EIS).”
- 2) Click on the “Choose File” button and locate the zip file you want to load. Remember that all XML files submitted to EIS must be zipped before loading. If there are others you want notified of this submission, enter their email addresses in the provided text box.
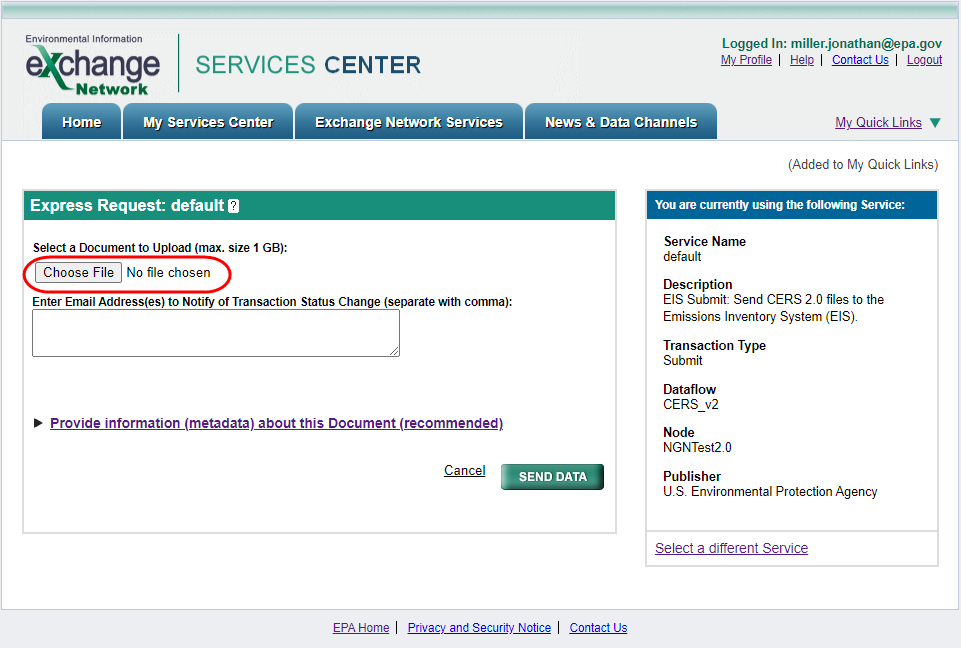
- 3) Click on the “SEND DATA” button.
- 4) Once the file has been sent, you will receive a screen like the following:
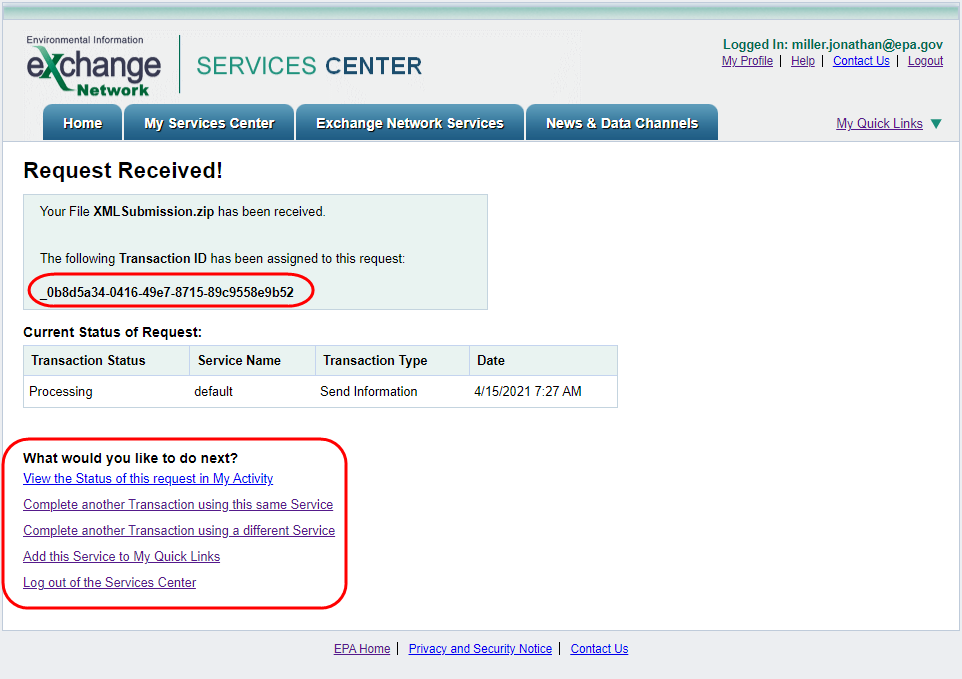
This provides you with the transaction id of the submission (this information will also be emailed to you). You may use the links at the bottom to check on the status of the given submission, submit another file, or submit a file using a different service. You are all done!