Point Emissions
Gateway users can make updates to individual emissions values for their agency’s Point source pollutants by editing them via the EIS Gateway. If the inventory window is open and a user has the appropriate permissions to edit pollutant data, the Gateway allows values of individual pollutants for emissions processes to be added, deleted or revised.
Edit Point Emissions
Follow the steps below to make any necessary changes to individual pollutant values for Point emissions processes.
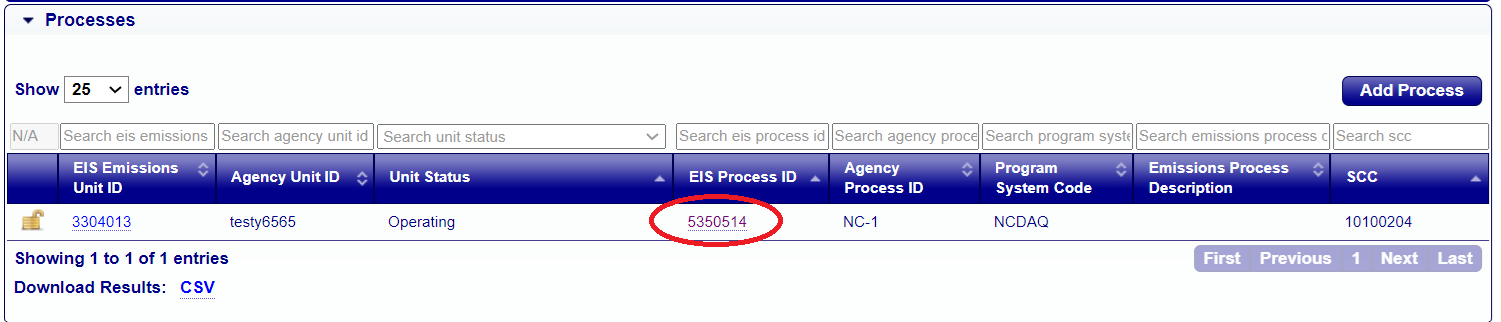
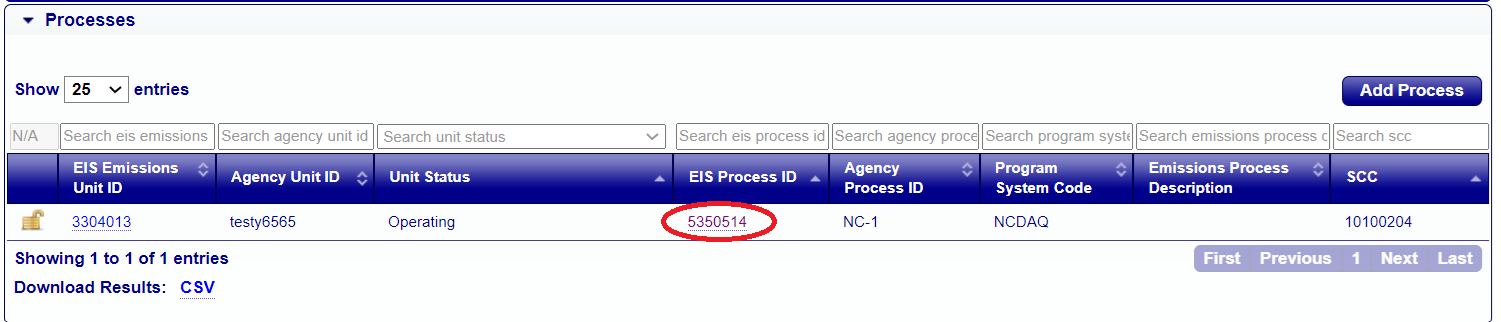
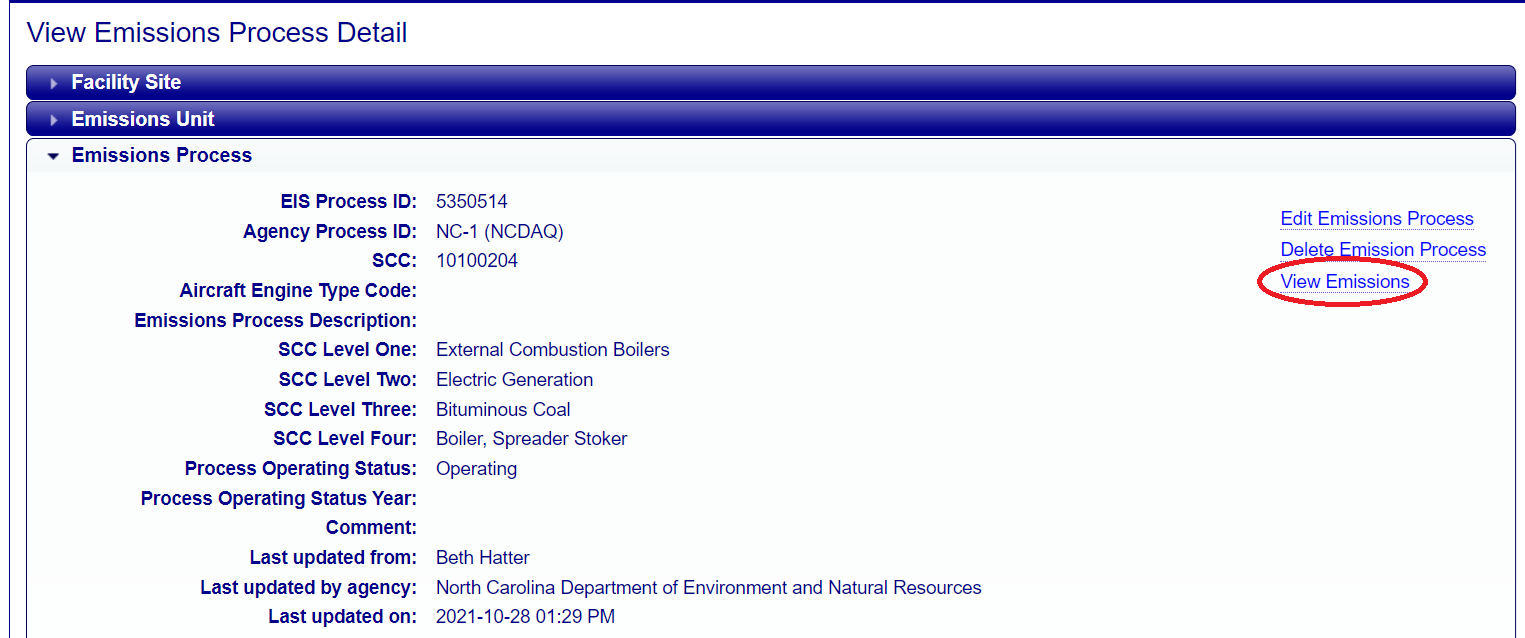
Step 1: Drill down to a facility’s individual point emissions process on the Gateway. Click on the EIS Process ID link to display the View Emissions Process Detail page.
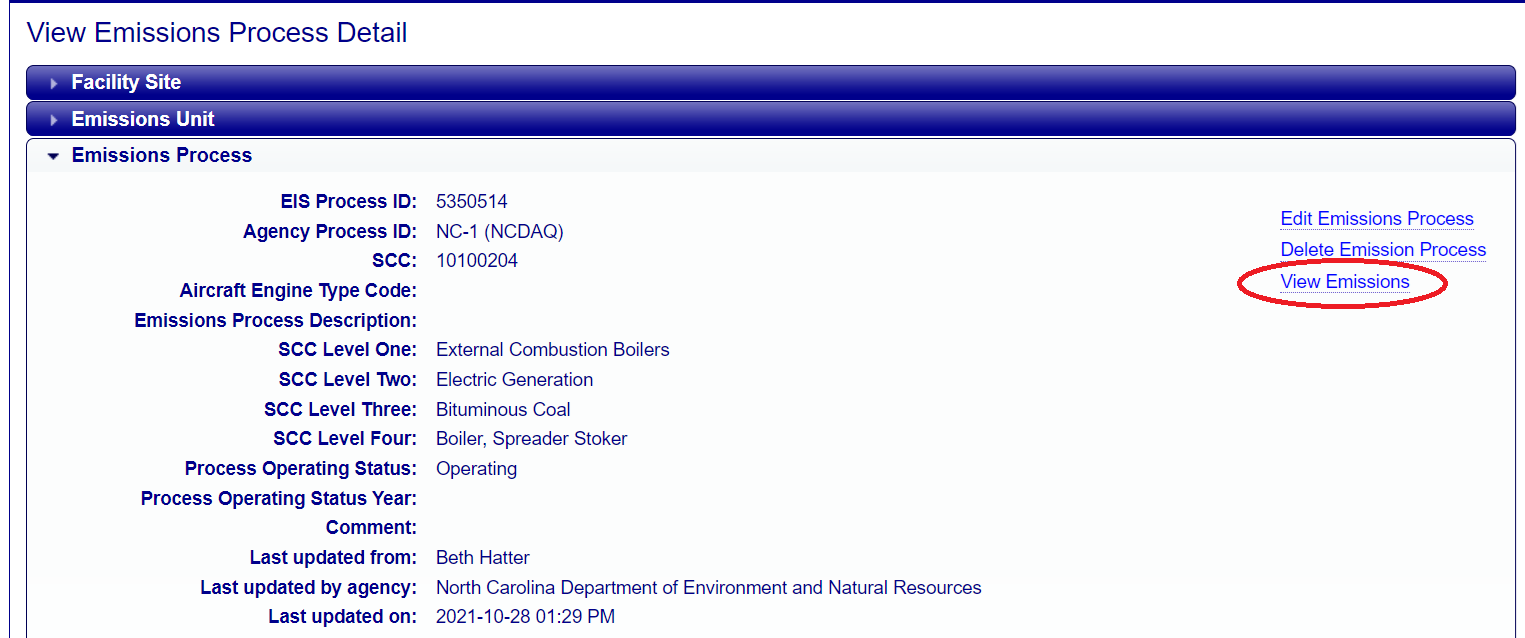
Step 2: Click the View Emissions link on the View Emissions Process Detail page.
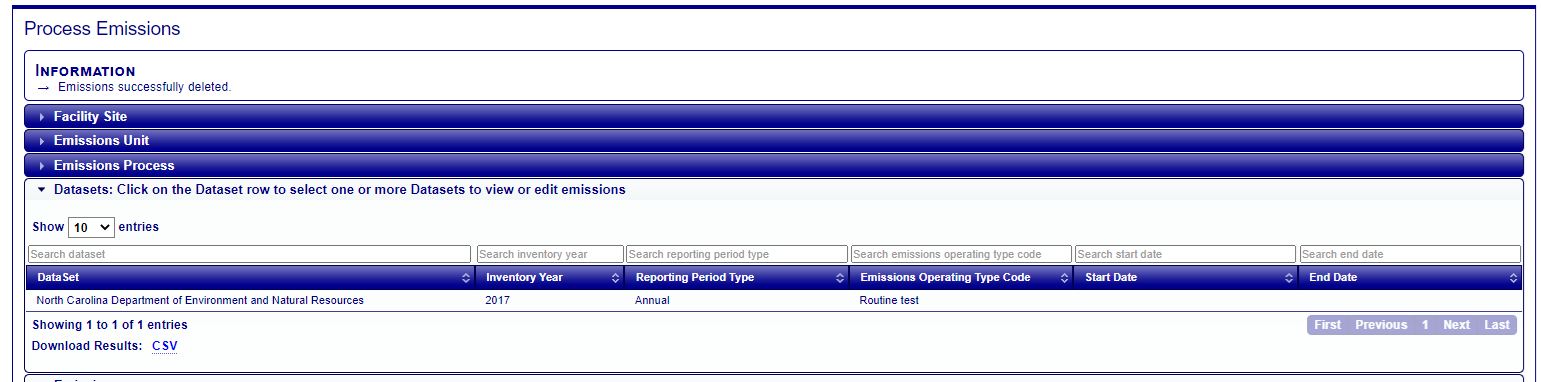
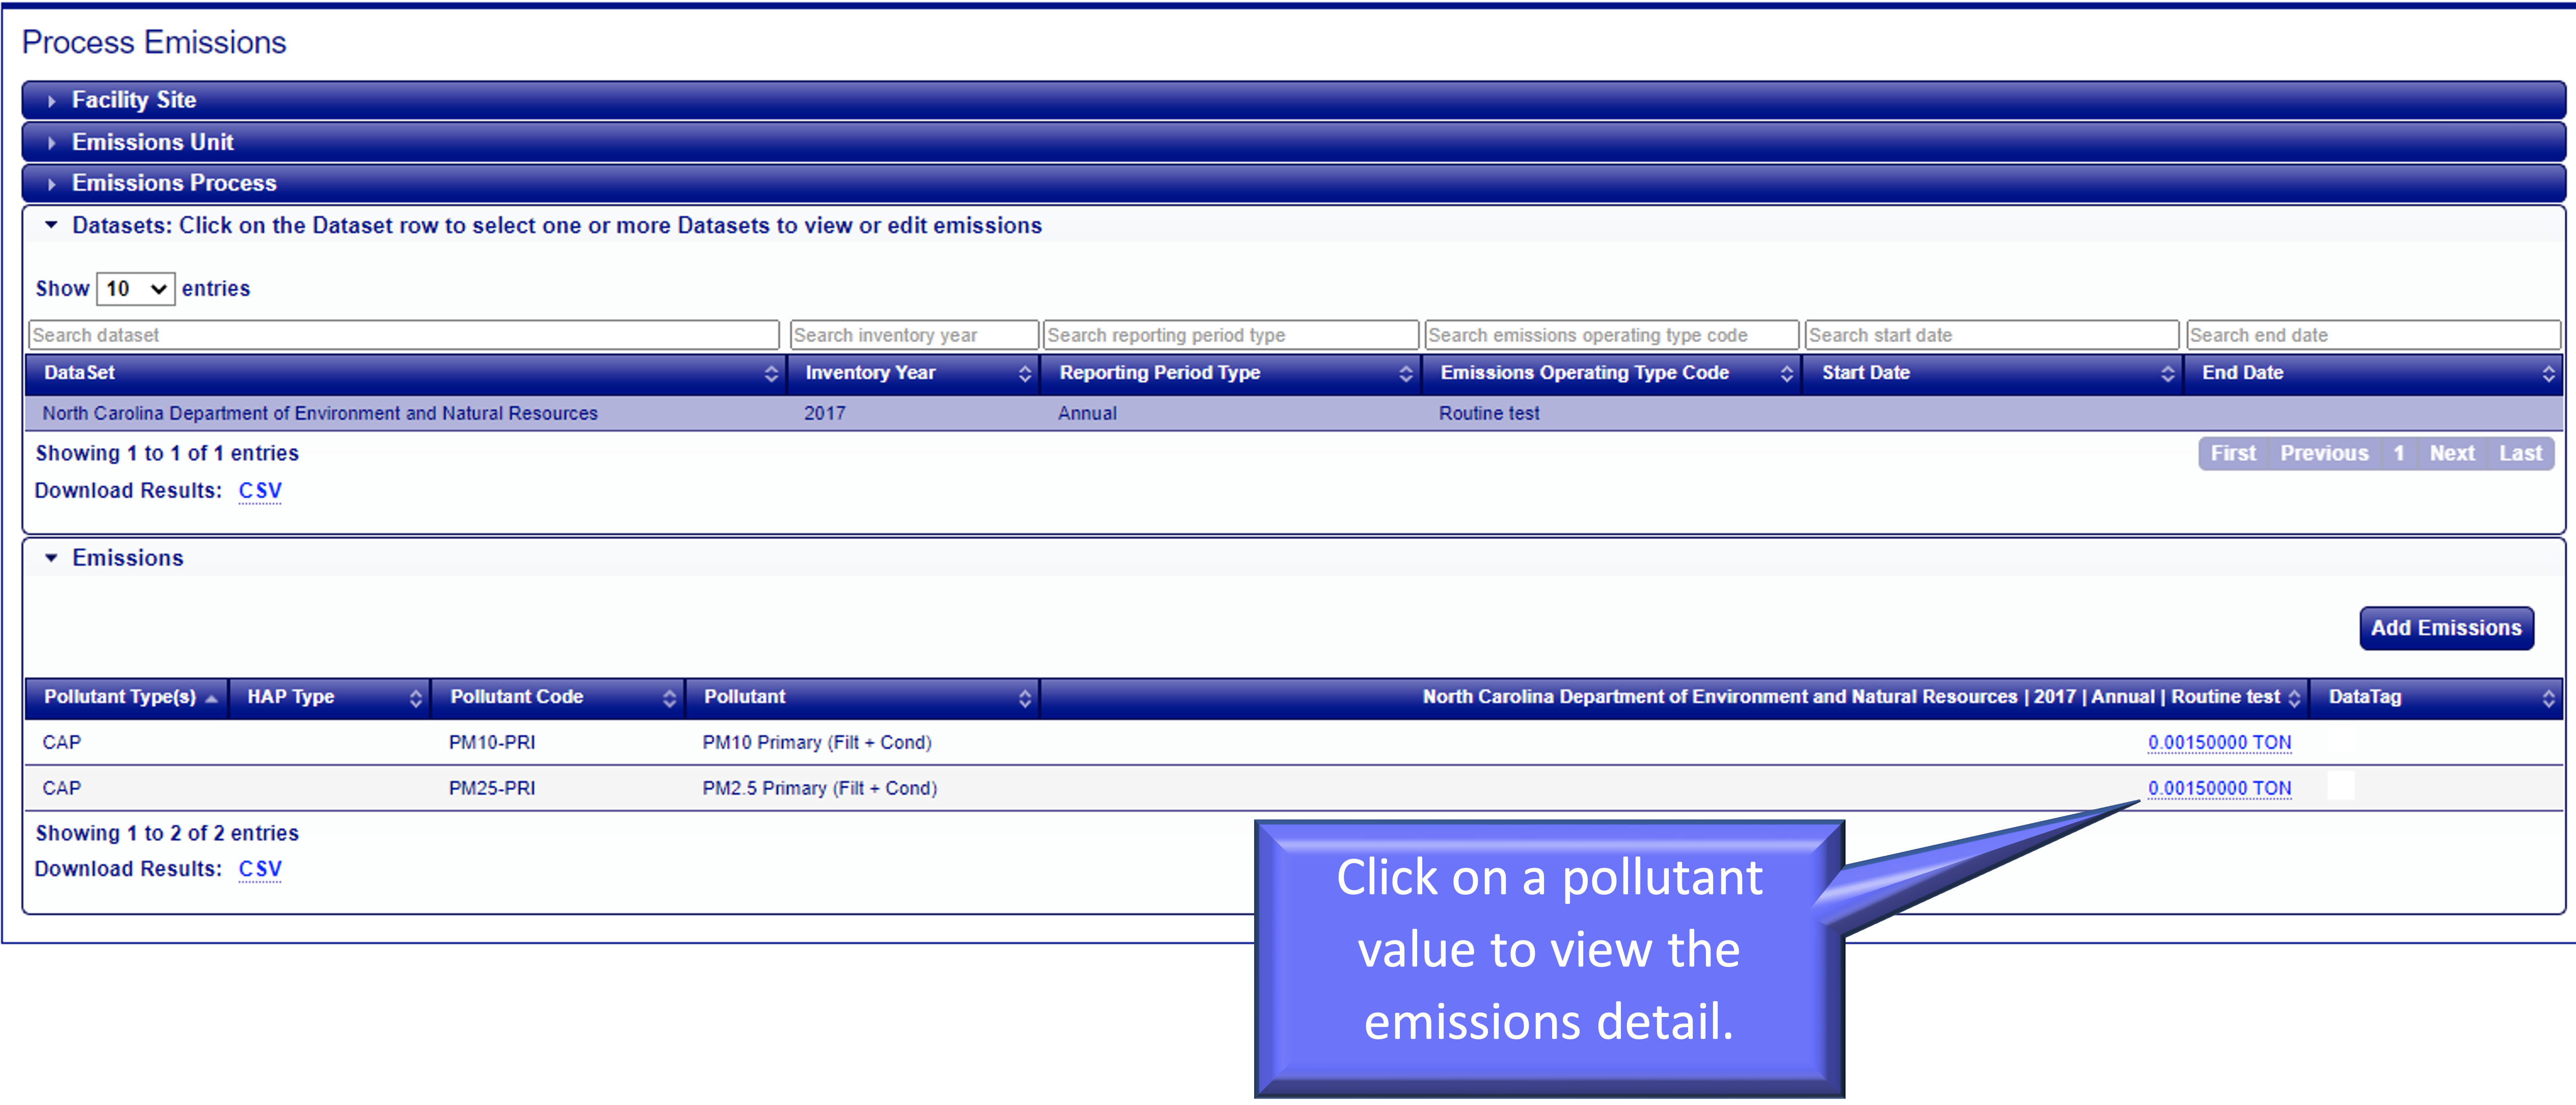
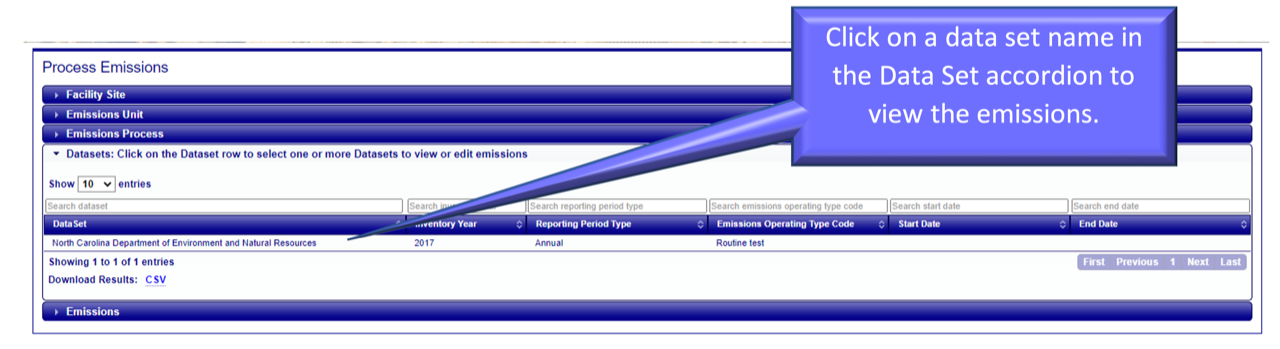
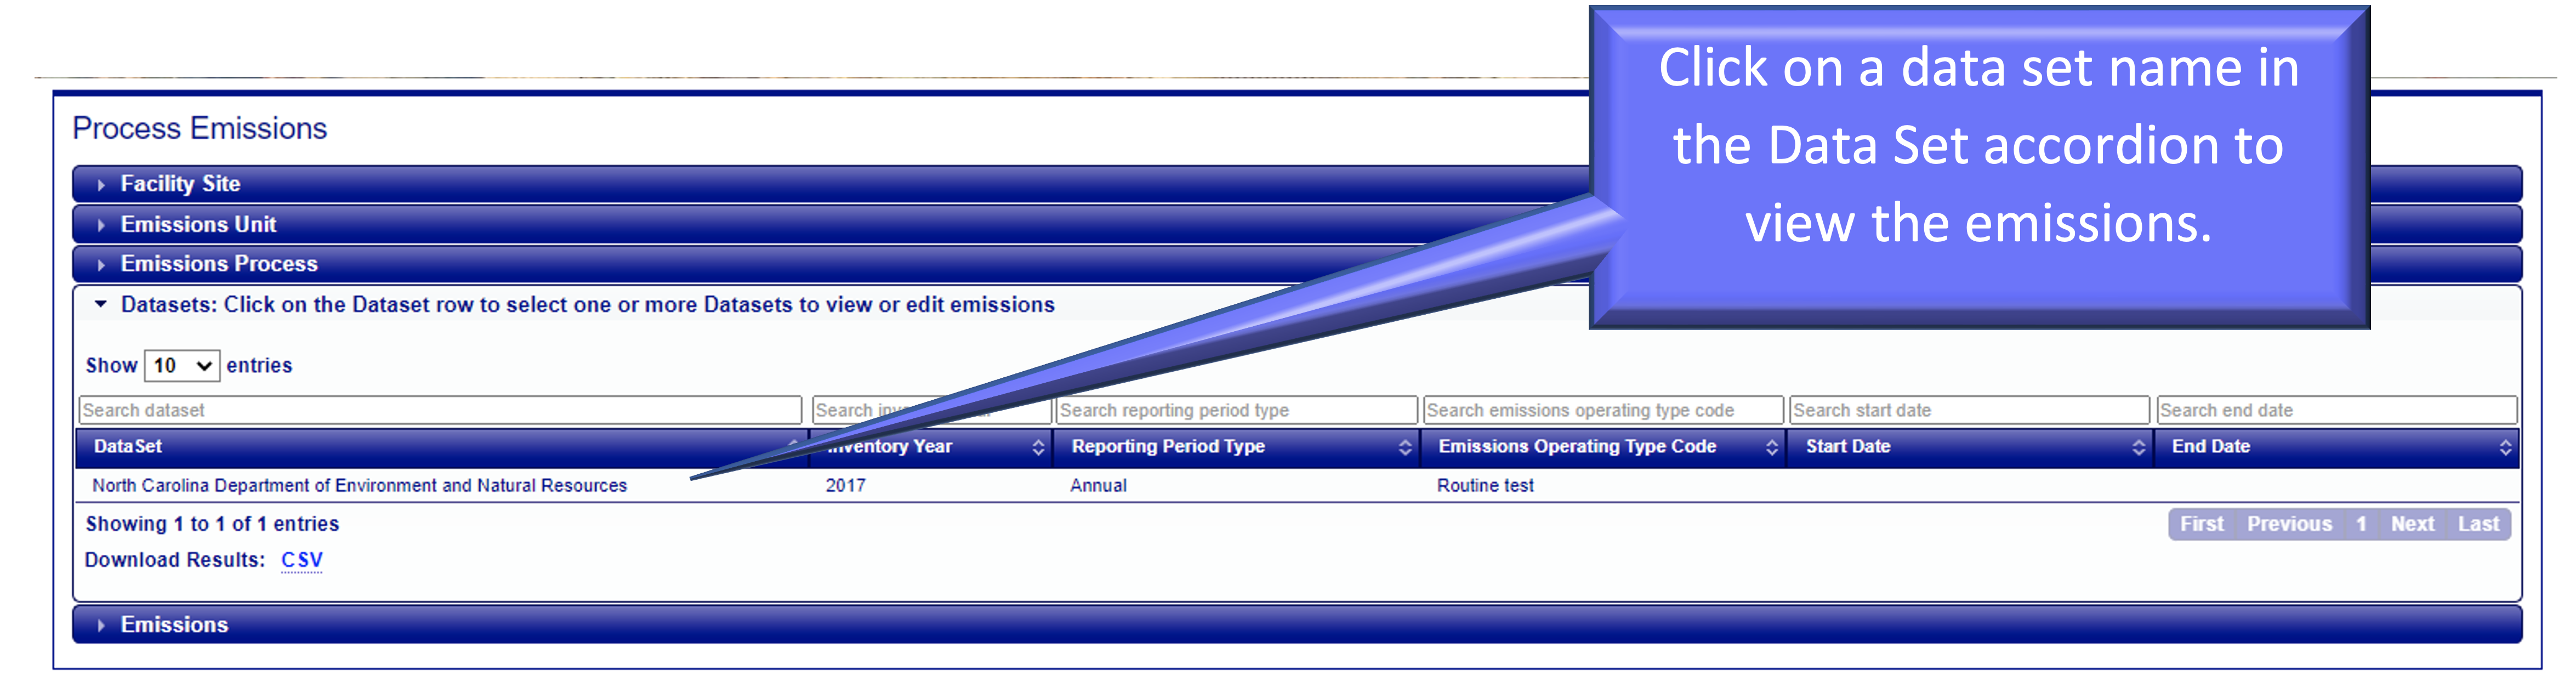
Step 3: On the Process Emissions page, a list of all the years and datasets for that process will be displayed. Select your state’s dataset and the appropriate inventory year ex. North Carolina Department of Environmental and Natural Resources 2017.
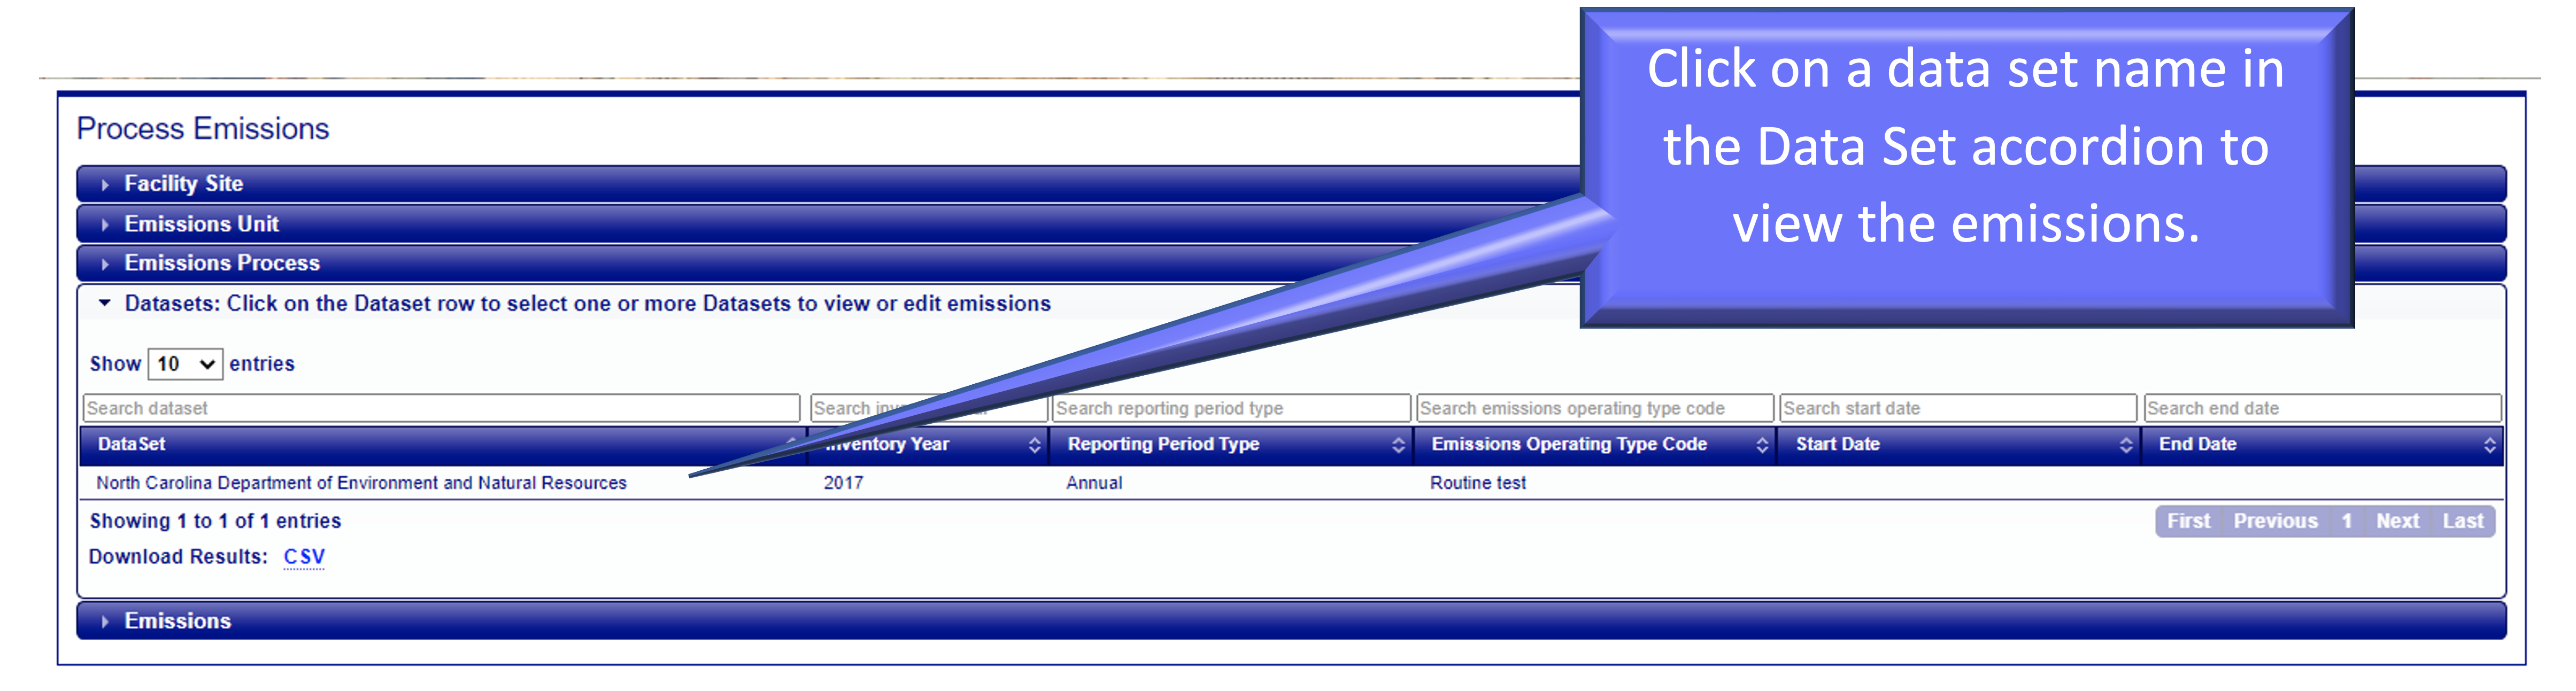
Clicking on a dataset row will highlight the dataset you selected and open the Emissions table that lists the individual pollutants and their values. Note: you many select more than one row of datasets to display emissions values for various data sets in one table.
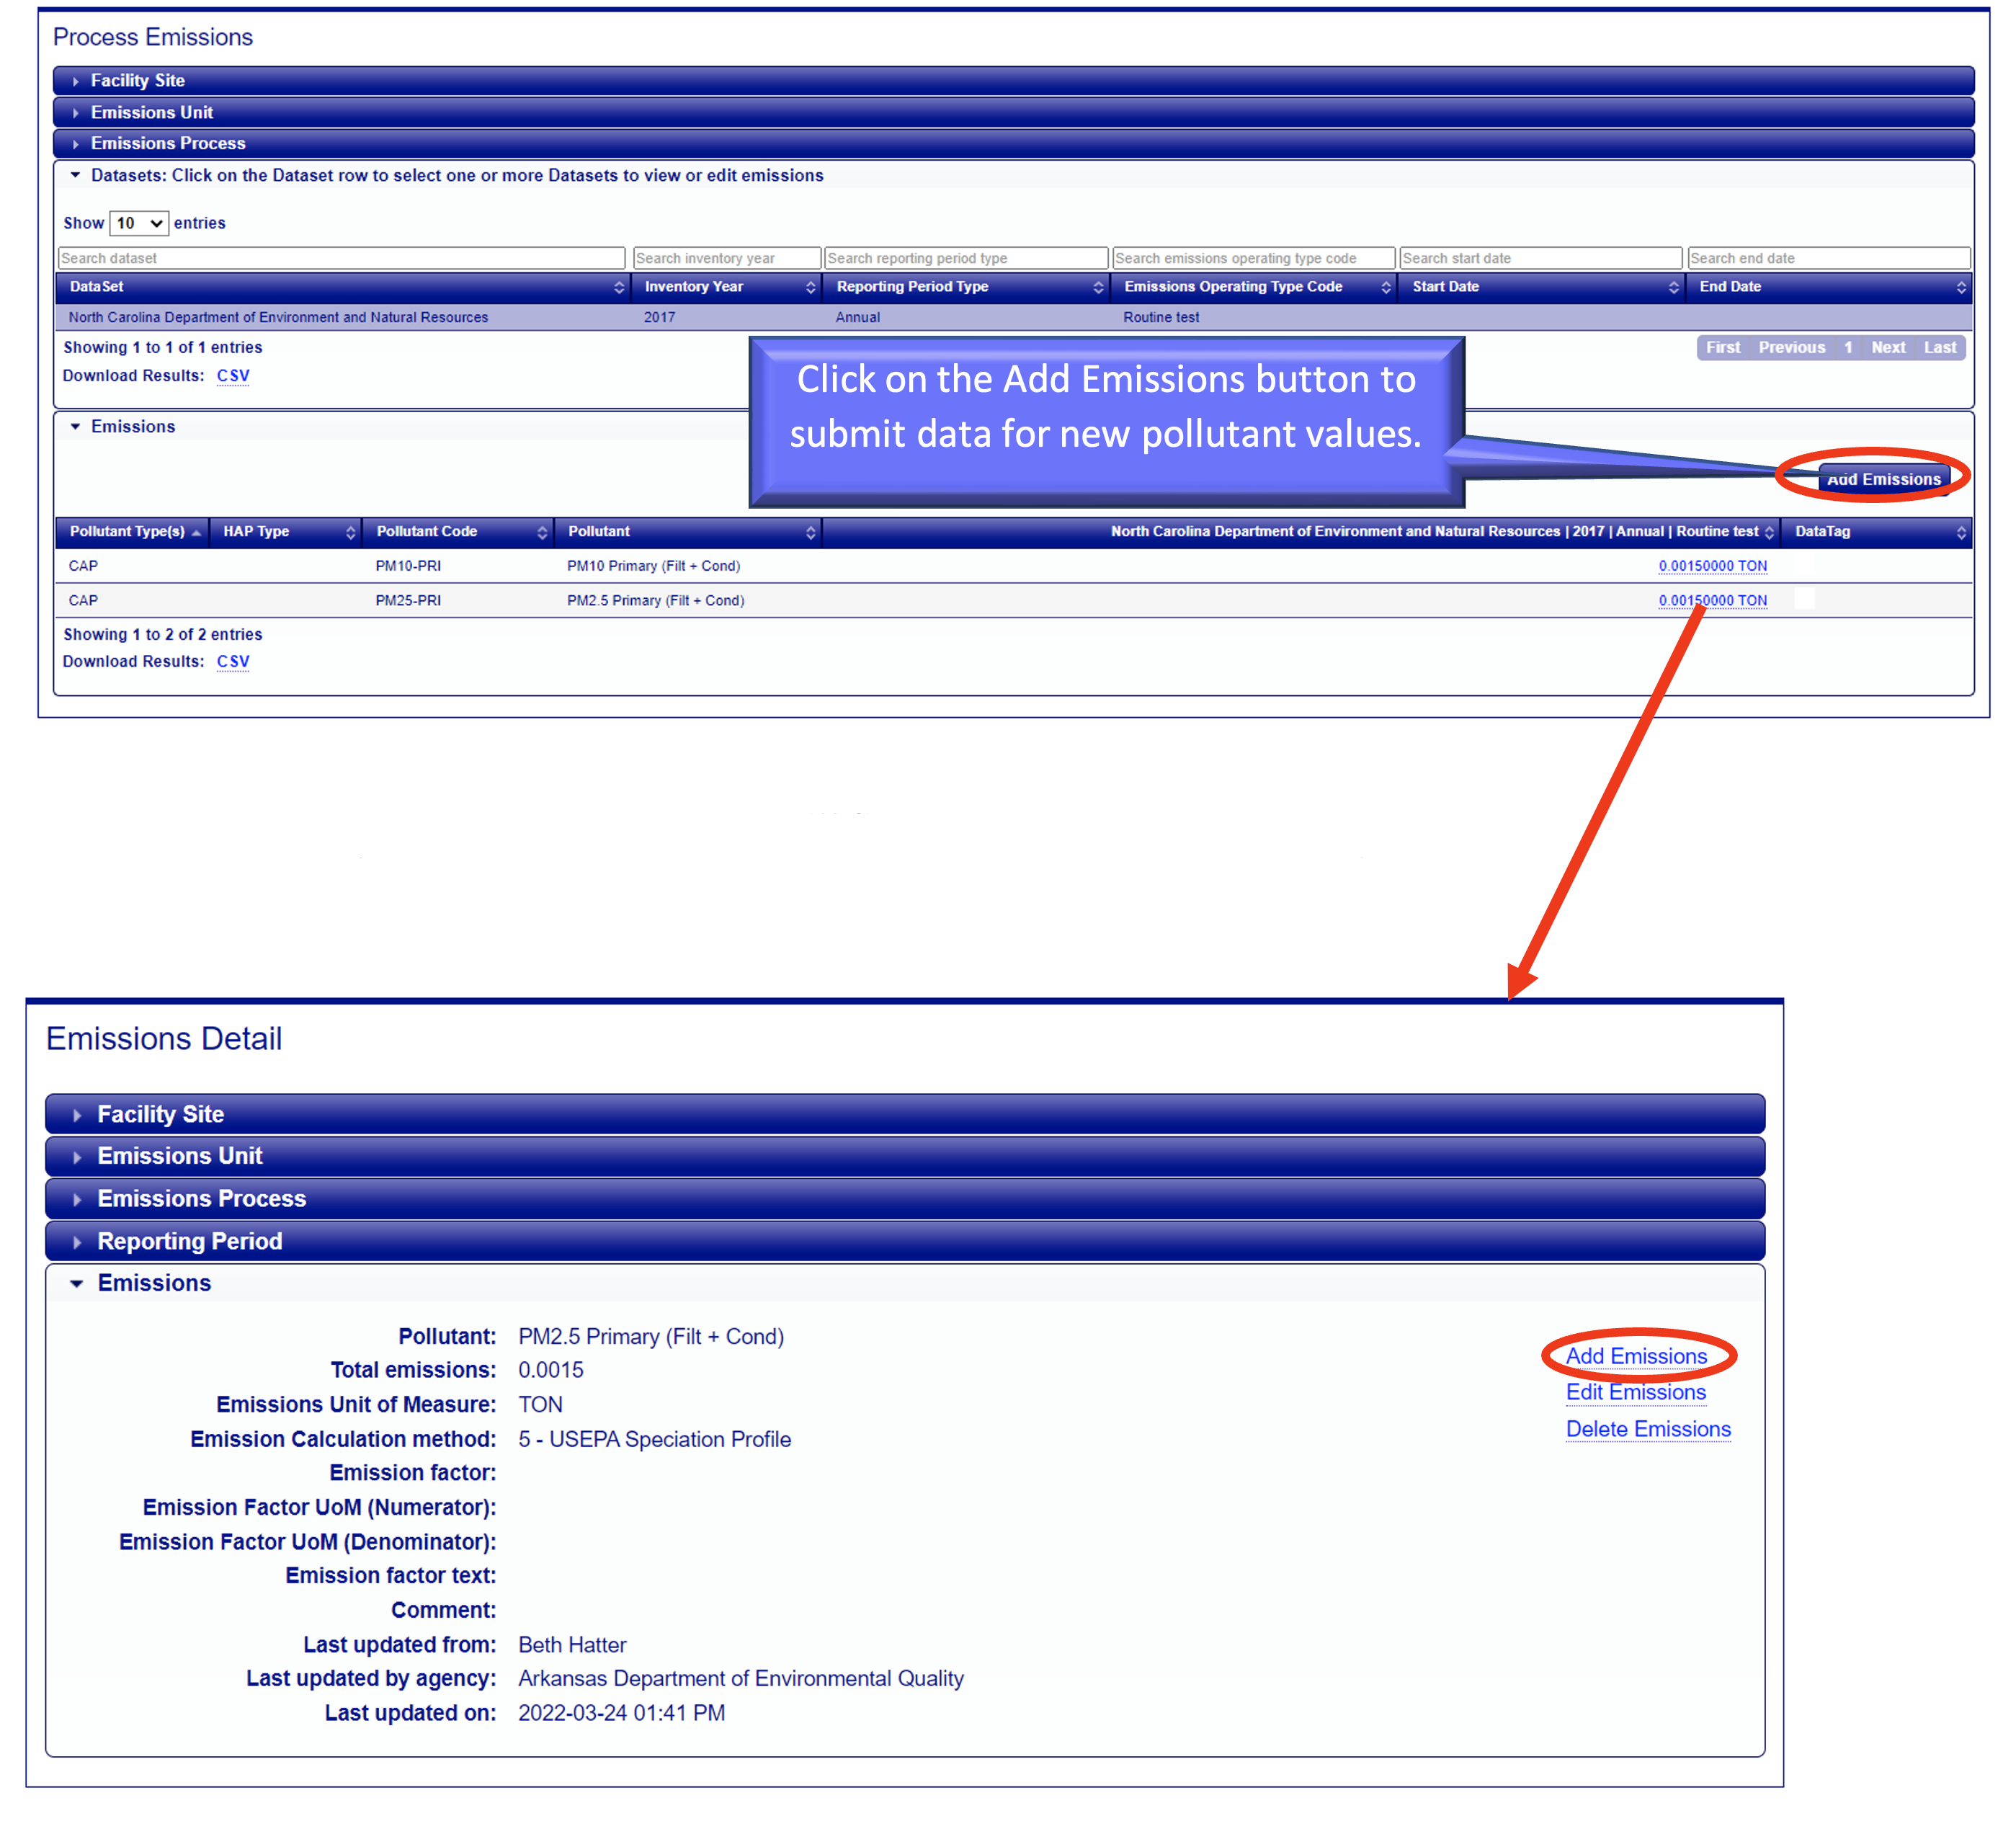
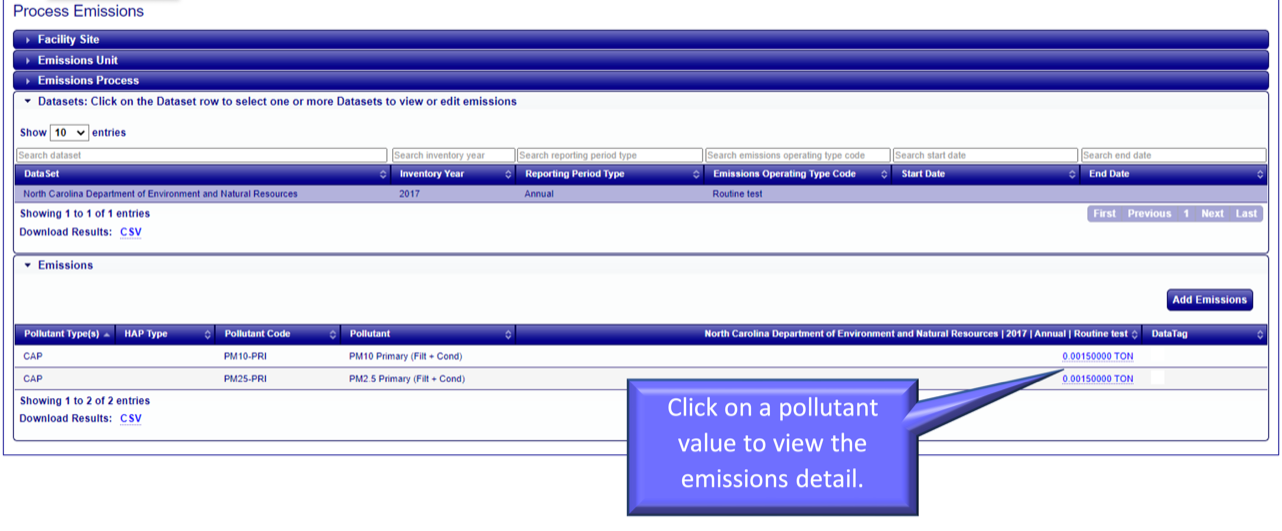
Step 4: Click on the blue link for the numeric emissions value that you would like to edit for the pollutant. This will display the Emissions Detail page.
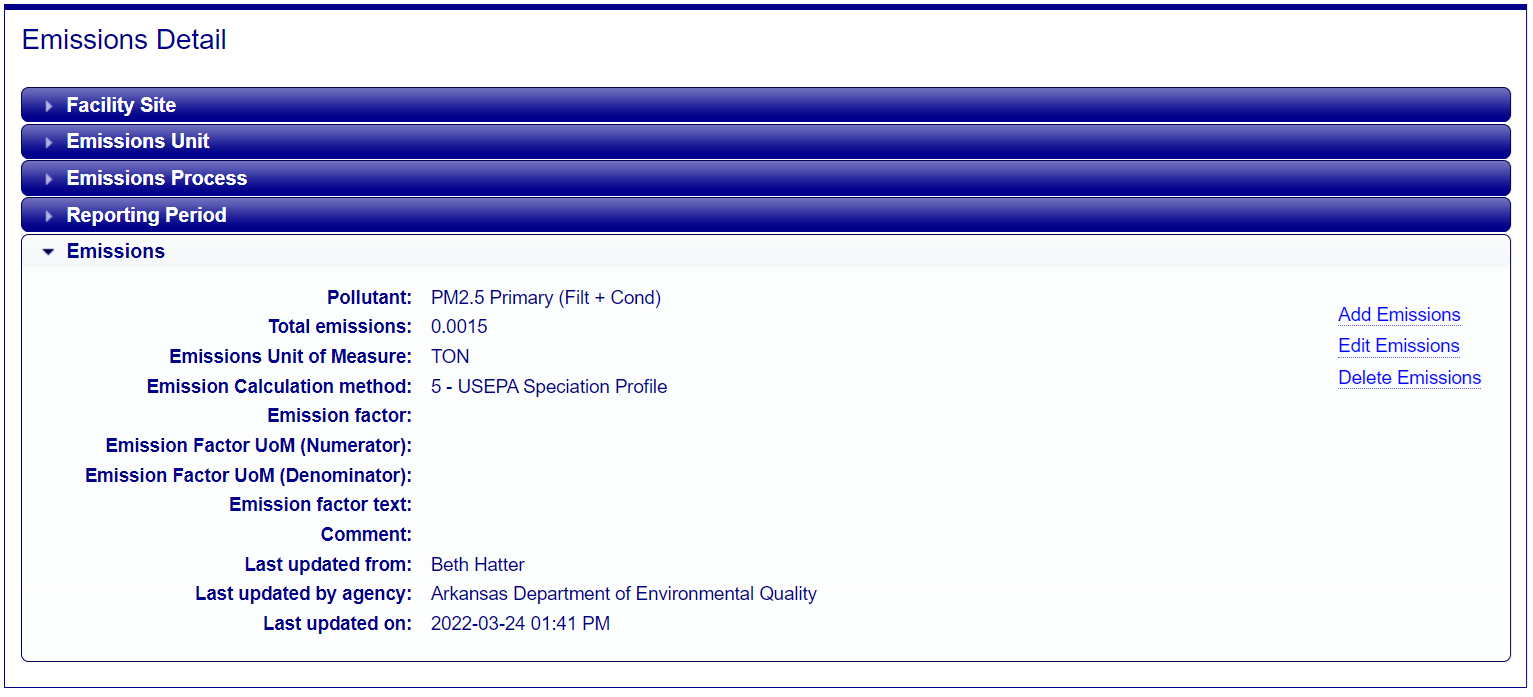
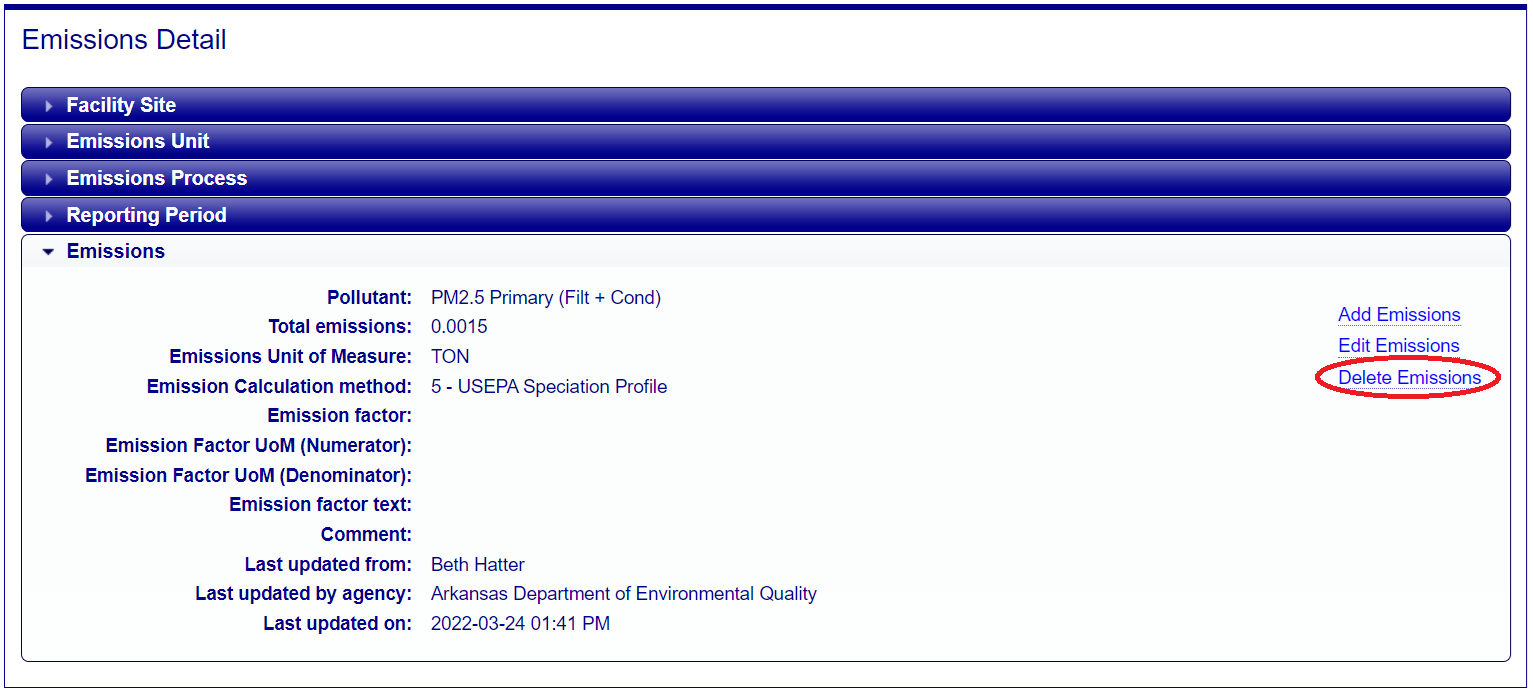
Step 5: If the inventory year is currently open for the dataset year that a user has selected to view emissions values for AND the user’s agency owns that data, then the links to Add, Edit and Delete emissions are displayed on the right side of the page
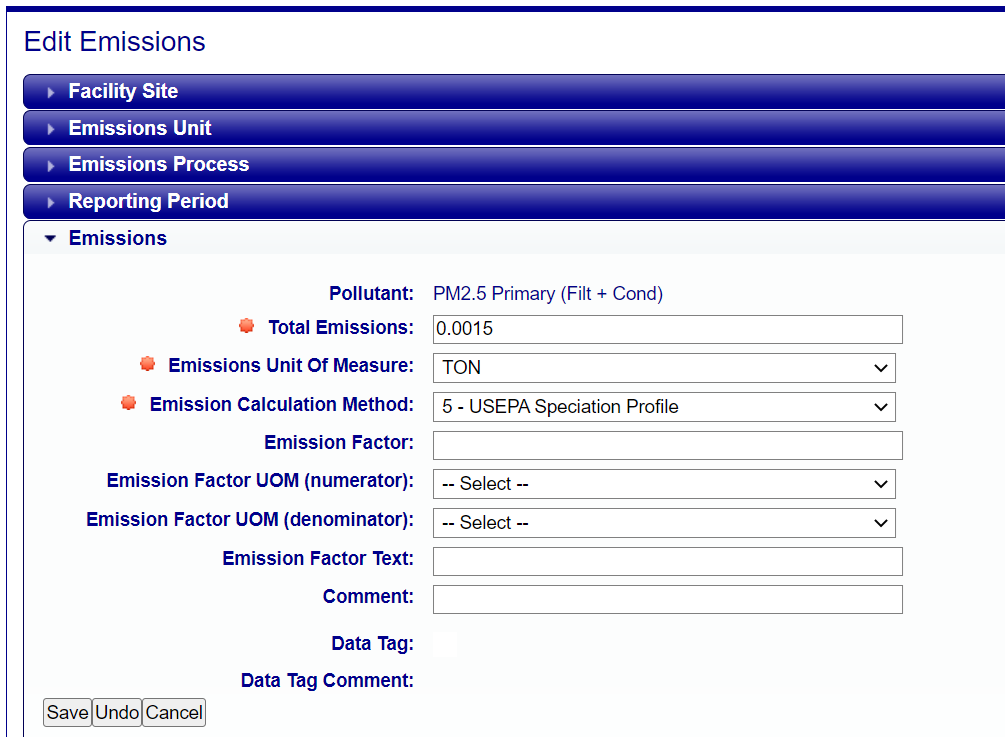
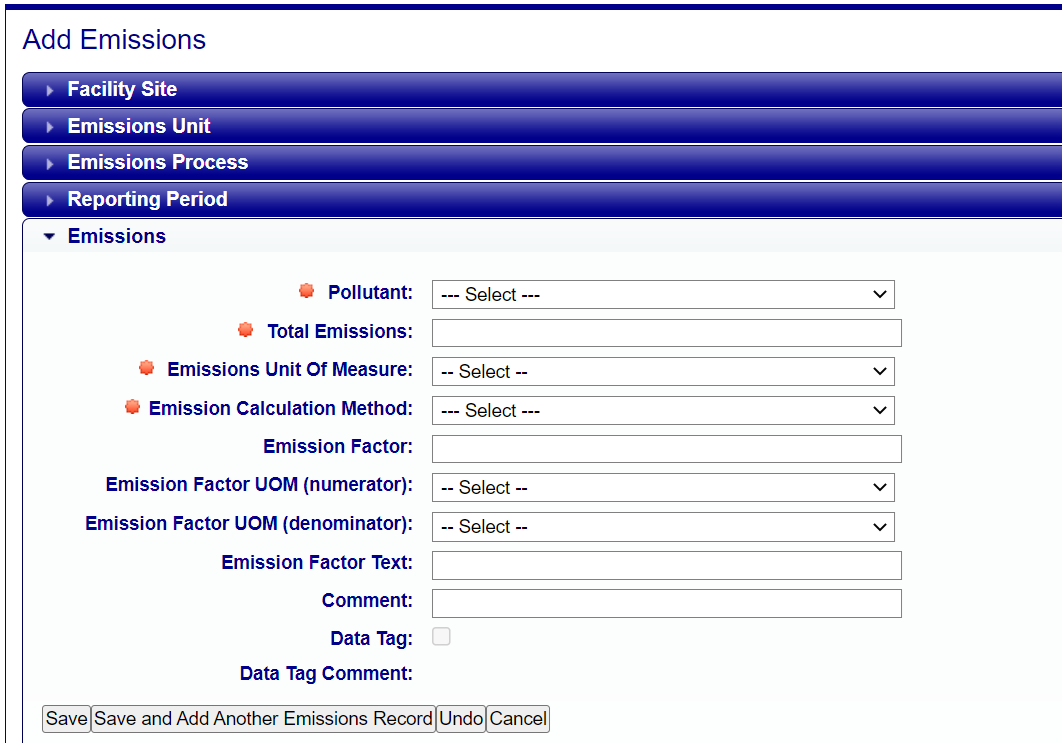
Click on the Edit Emissions link to open the Edit Emissions form and complete updates in the text fields. Note that the Pollutant, Total Emissions, Emissions Unit of Measure, and Emission Calculation Method are required fields and must be populated.
Add Point Emissions
Follow the steps below to add individual pollutant values to Point emissions processes.
Step 1: Drill down to a facility’s individual point emissions process on the Gateway. Click on the EIS Process ID link to display the View Emissions Process Detail page.
Step 2: Click the View Emissions link on the View Emissions Process Detail page.

Step 3: On the Process Emissions page, a list of all the years and datasets for that process will be displayed. Select your state’s dataset and the appropriate inventory year ex. North Carolina Department of Environmental and Natural Resources 2017.
Clicking on a dataset row will highlight the dataset you selected and open the Emissions table that lists the individual pollutants and their values. Note: you many select more than one row of datasets to display emissions values for various data sets in one table.
Step 4: If the inventory year is currently open for the dataset year that a user has selected to view emissions values for AND the user’s agency owns that data, then the button to Add Emissions will be displayed on the Process Emissions page. Click on the Add Emissions button to add pollutant data for the Process Emissions for the data set highlighted. This will display the Add Emissions page.
Step 5: Complete the Add Emissions form by populating the text fields with the pollutant details. Note that the Pollutant, Total Emissions, Emissions Unit of Measure, and Emission Calculation Method are required fields and must be populated.
Delete Point Emissions
Follow the steps below to delete individual pollutant values for Point emissions processes.
Step 1: Drill down to a facility’s individual point emissions process on the Gateway. Click on the EIS Process ID link to display the View Emissions Process Detail page.

Step 2: Click the View Emissions link on the View Emissions Process Detail page.
Step 3: On the Process Emissions page, a list of all the years and datasets for that process will be displayed. Select your state’s dataset and the appropriate inventory year ex. North Carolina Department of Environmental and Natural Resources 2017.
Clicking on a dataset row will highlight the dataset you selected and open the Emissions table that lists the individual pollutants and their values. Note: you many select more than one row of datasets to display emissions values for various data sets in one table
Step 4: Click on the blue link for the numeric emissions value that you would like to delete. This will display the Emissions Detail page.
Step 5: If the inventory year is currently open for the dataset year that a user has selected to view emissions values for AND the user’s agency owns that data, then the links to Add, Edit and Delete emissions are displayed on the right side of the page.
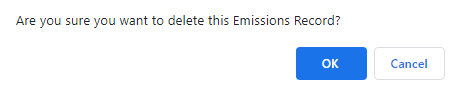
Click on the Delete Emissions link to delete the pollutant value for that emissions process. You will see a confirmation dialogue message confirming you want to delete the emissions record.
After clicking okay to confirm the deletion of the emissions, you will be returned to the Process Emissions page where a confirmation information message is displayed for the successful deletion.